
I love receiving emails and comments from readers and how this site has helped them out with a problem or question. Today, I received an email from Henrik in Sweden about the “Automatically Add to iTunes” folder after he read my article on How to Convert FLAC to Apple Lossless for iTunes Playback. The question was whether or not this folder is created automatically by iTunes or if this is something that I created.
The answer to the question is that this folder is automatically created by iTunes. The folder is located at the root level of the iTunes Media folder for both Mac and Windows users.
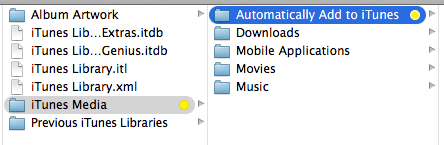 |
| The Automatically Add to iTunes folder is located inside the iTunes Media Folder |
Using the folder is simple, simply drag music files into the folder and they will be automatically added to your iTunes library.
If you plan on adding a lot of items automatically to iTunes, there are two tips that will make your life a bit easier:
The first little trick you can use that works on both Mac and Windows PCs—that’s the shortcut or alias feature.
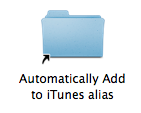
When I’ve needed to copy a large volume of media to my iTunes library I make an alias of the folder (shortcut in Windows terms) and move the alias to my desktop. It’s then easy for me to move music, TV shows, or movies to that folder and have the media added to iTunes automatically. Important: Do not move the original folder or attempt to leave an alias in the iTunes Media folder. That won’t work.
The second trick is a Mac-only trick and involves using the Dock. Simply add the “Automatically Add to iTunes” folder to the Dock and it will be available to you instantly any time.

There are some additional tips and tricks you’ll want to be aware of as you use the folder. I copied some of the items from Apple’s knowledge base article on Understanding the Automatically Add to iTunes folder.
- The folder only works when iTunes is active.
- If you don’t see the folder where it should be, then you can either add it manually or reinstall iTunes and iTunes will add it automatically. If you choose to add it manually, be sure to create the folder with the exact name and capitalization that iTunes expects. The folder should be Automatically Add to iTunes.
- Finally, just because you have the folder, doesn’t mean everything you put in it will be added to the library. If iTunes runs into a file or folder that is in an incompatible format or one that iTunes has trouble reading, it will kick it out into another folder called “Not Added”. According to Apple’s Knowledge base, the Not Added folder organizes incompatible files in folders indicating the date and time iTunes attempted to add these files. iTunes does not delete files from the Not Added folder. That means you’ll need to occasionally review the contents of this folder and delete or convert these files.
- While iTunes is open, files are immediately analyzed and added to your iTunes library when you add files to this folder. If you add files to this folder when iTunes is closed, iTunes analyzes and adds them the next time you open iTunes.
- Do not use the “Automatically Add to iTunes” folder to store partial recordings, imports, or temporary files. This can result in incomplete or duplicate content.
- This feature requires the folder to be in the same location as your iTunes Music or iTunes Media folder. Do not move this folder or use an alias or shortcut to redirect iTunes to look in a new location.
- iTunes for Windows only: When placing WMA files in the “Automatically Add to iTunes” folder, iTunes converts these files to an iTunes-compatible format and adds them to the iTunes library. After the conversion is complete, iTunes places the original WMA file in the Not Added folder. iTunes does not delete the WMA file after conversion.
The Automatically Add to iTunes folder is a quick and simple way to help you import content into your Library. Hopefully, these tips and tricks will help you manage your media library more effectively.


 and Edge NQ network streamers gain Roon support")


 and Edge NQ network streamers gain Roon support")
 review: The perfect audiophile streaming speaker")
